Steps for doing Load Testing with NeoLoad:
1. Recording HTTP traffic between browser and server
NeoLoad includes a proxy server that records all server requests and responses.
2. Defining test parameters
Defining Virtual User behavior and setting scenario parameters such as load policy (constant, ramp-up, peak or custom) or the number of Virtual Users to be simulated in the test.
Setting performance monitors (CPU, memory, disk usage, and so on) for your servers.
3 .Running the test
Monitoring the ongoing test with the aid of real-time graphs and stats.
4. Analyzing the results
Obtaining a summary of the test and then examining its details using the graphs and statistical tables.
Designing a Test Scenario:
Designing a test scenario consists in recording a web browsing sequence. NeoLoad keeps track of every browsing action to create a simulated user: It is the Virtual User. The Virtual User helps generate a behavior pattern, called Virtual User Profile. When running a test, NeoLoad relies on the Virtual User Profile to create duplicates — customized with variables — of the simulated user.
A test scenario is easy and quick to design, within a test project, thanks to the wizards available in NeoLoad. The design process includes the following steps:
-> Creating a test project with the File > New command in the NeoLoad Controller

-> Creating a Virtual User and configuring the recording conditions from the Welcome wizard or with the Record > Start Recording command

-> Recording the sequence in the browser and organizing actions in Containers while recording

-> Once recording is done, setting post-recording parameters

-> Configuring the Virtual User Profile in the Vitual Users tab of the Design section in the NeoLoad Controller

-> Checking the Virtual User Profile in the Check Virtual User wizard, accessible with Run > Start checking in the NeoLoad Controller

-> Organizing Profiles in groups — called Virtual Users Populations — in the Populations tab of the Design section in the NeoLoad Controller

-> Defining the monitors of the servers hosting the tested application, in the Monitors tab of the Design section in the NeoLoad Controller

To design a test scenario:
1. In NeoLoad, choose File > New to create a new test project.
2. In the project, click Start Recording. In the Recording dialog box, enter the name of the Virtual User and specify the conditions of the browsing sequence you are ab out to capture.
3.In the displayed web browser, enter the URL of the test site. Browse as usual. NeoLoad records all your actions.
4. When recording (or after), you can create Containers to organize the visited pages and structure your scenario as business transactions. Subsequently you can configure them for reuse in other scenarios.
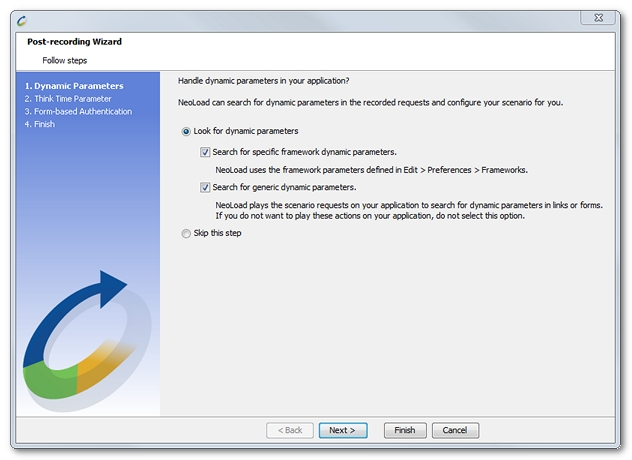
5. Once you are done with the browsing sequence, click Stop Recording. The Post-recording Wizard pops up. Follow the wizard steps to configure your Virtual User.
6. Back in the NeoLoad Controller, specify the running parameters of the new Virtual User in the Runtime Parameters area.
7. To check the Virtual User — and correct errors or unexpected behavior —, choose Run > Start Checking > Start Checking. Check the requests and the responses. Check every potential error raised by NeoLoad.
8. Back in the NeoLoad Controller, you choose the Populations tab to manager Virtual Users groups with the wizard.
9. Choose the Monitors tab to define the monitors of the servers hosting the tested application.


Note: All the above information is copied from the following webs site. please visit the site for details information.
1. Recording HTTP traffic between browser and server
NeoLoad includes a proxy server that records all server requests and responses.
2. Defining test parameters
Defining Virtual User behavior and setting scenario parameters such as load policy (constant, ramp-up, peak or custom) or the number of Virtual Users to be simulated in the test.
Setting performance monitors (CPU, memory, disk usage, and so on) for your servers.
3 .Running the test
Monitoring the ongoing test with the aid of real-time graphs and stats.
4. Analyzing the results
Obtaining a summary of the test and then examining its details using the graphs and statistical tables.
Designing a Test Scenario:
Designing a test scenario consists in recording a web browsing sequence. NeoLoad keeps track of every browsing action to create a simulated user: It is the Virtual User. The Virtual User helps generate a behavior pattern, called Virtual User Profile. When running a test, NeoLoad relies on the Virtual User Profile to create duplicates — customized with variables — of the simulated user.
A test scenario is easy and quick to design, within a test project, thanks to the wizards available in NeoLoad. The design process includes the following steps:
-> Creating a test project with the File > New command in the NeoLoad Controller

-> Creating a Virtual User and configuring the recording conditions from the Welcome wizard or with the Record > Start Recording command
-> Recording the sequence in the browser and organizing actions in Containers while recording

-> Once recording is done, setting post-recording parameters
-> Configuring the Virtual User Profile in the Vitual Users tab of the Design section in the NeoLoad Controller

-> Checking the Virtual User Profile in the Check Virtual User wizard, accessible with Run > Start checking in the NeoLoad Controller

-> Organizing Profiles in groups — called Virtual Users Populations — in the Populations tab of the Design section in the NeoLoad Controller

-> Defining the monitors of the servers hosting the tested application, in the Monitors tab of the Design section in the NeoLoad Controller

To design a test scenario:
1. In NeoLoad, choose File > New to create a new test project.
2. In the project, click Start Recording. In the Recording dialog box, enter the name of the Virtual User and specify the conditions of the browsing sequence you are ab out to capture.
3.In the displayed web browser, enter the URL of the test site. Browse as usual. NeoLoad records all your actions.
4. When recording (or after), you can create Containers to organize the visited pages and structure your scenario as business transactions. Subsequently you can configure them for reuse in other scenarios.
5. Once you are done with the browsing sequence, click Stop Recording. The Post-recording Wizard pops up. Follow the wizard steps to configure your Virtual User.
6. Back in the NeoLoad Controller, specify the running parameters of the new Virtual User in the Runtime Parameters area.
7. To check the Virtual User — and correct errors or unexpected behavior —, choose Run > Start Checking > Start Checking. Check the requests and the responses. Check every potential error raised by NeoLoad.
8. Back in the NeoLoad Controller, you choose the Populations tab to manager Virtual Users groups with the wizard.
9. Choose the Monitors tab to define the monitors of the servers hosting the tested application.
Running a Test:
Running a test consists in replaying a recorded scenario, but with amplified parameters of load and length. A test plan can meet a number of complementary objectives: checking the application in a unitary test, launching a realistic test on the application, and testing the application to its limits. Inspecting the results of every test helps take the necessary actions to ensure the application is robust and productive enough. For more information, see Defining Objectives.
In the Runtime section of the NeoLoad Controller, the test running process must be defined before launching it:
-> Configuring the test parameters and starting the test in the Scenarios tab in the NeoLoad Controller

Once started, the test can be followed in real time with a variety of information tabs:
-> Following the general process of the test in real time in the Runtime Overview tab

To run a test:
1. In the NeoLoad Controller, open your project. Click Runtime.
2. In the Scenarios tab, choose a scenario and a Population for the test. Specify the test parameters (length, load, number of Virtual Users, and so on).
3. To launch the test, choose Run > Start playing. Enter the name and description of your test. Click OK.
4. In the Runtime Overview tab, watch the general performance of the test.
5. In the Runtime Graphs tab, select the graphs of specific interest with drag-and-drops.
6. In the Runtime Errors tab, select a raised running error to view its description.
7. In the Runtime Alerts tab, select a raised server or SLA alert to view its description.
8. In the Runtime Users tab, watch the Virtual Users used in the test.
9. At the end of the end, NeoLoad automatically display the Results section.
Note: All the above information is copied from the following webs site. please visit the site for details information.
steroid satın al
ReplyDeleteheets
5ADLYW
pusulabet
ReplyDeletesex hattı
https://izmirkizlari.com
rulet siteleri
rexbet
1X8C25
ıldır transfer
ReplyDeletegüzelbahçe transfer
foça transfer
mordoğan transfer
aliağa transfer
M8H1